Prototyping
Classification
#process
Intent
- Plan out the level.
- Test the level at an early stage.
- Provide a parallel process to the more theoretical methods of level design.
- Support the agile approach of level design.
Problem
General
- Individuals prefer different methods and processes based on their personal preferences, making it challenging to define a universally suitable process.
- Designers of software products might initiate the mapping and prototyping of a product too late. Without an early prototype, the project could encounter issues that could have been detected earlier.
Specific
- Jumping into development without proper level planning can increase time and effort for both designers and the entire team.
- Designers sometimes lack a clear vision of the end product, focusing solely on theoretical visions and what-ifs.
- Prototyping and blocking out the level aids in understanding and planning.
Process Steps
1. Understand what to create
- Define the goals and intent of your creation.
- Collect references to help define the level’s aesthetics, story, and general idea.
- Input: Ideas and visions.
- Application: Collect references, create Mood Boards and Reference Collection, document your ideas and initial decisions using Pillars, Goals and Features, [[ Methods/High Concept ]], and Lenses. Collaborate with your team to establish a shared vocabulary.
- Output: Formalized ideas and decisions documented in Text, depicted in Sketch, and compiled in a reference Collection or a Venn Diagram.
- Roles: #roles/designer Designer, #roles/artists Artist.
- Relevant Tools: Communication Tools, Digital Collection Tools, Non-digital Design Tools.
- Relevant Methods: Refer to the linked methods above.
2. Create a bubble diagram or flowchart
- Plan the spatial relationships of your level.
- Establish the spatial layout and flow of your level.
- Input: Definitions of the rooms and spaces within the level, ideas about progression and pacing.
- Application: Create a Molecule Diagram by representing spaces as nodes and connecting them with edges. Name the nodes, consider space accessibility, and outline how the player will traverse the level.
- Output: A Diagram illustrating spatial relationships within the level.
- Roles: #roles/designer Designer.
- Relevant Tools: Digital Diagram Tools, Non-digital Design Tools.
- Relevant Methods: Molecule Diagram, Proximity Diagram, Pacing Diagram, Reward Schedule.
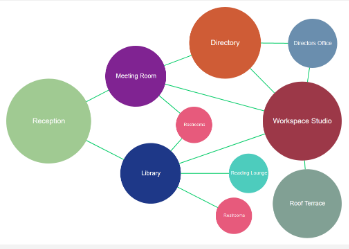 (Source: TychoBolt (K., Alex) 2020 - In Pursuit of Better Levels, p.9)
3. Draw a Map
- Illustrate the diagram from step 2 as a map and add details.
- Plan combat, visual cues, and more.
- Input: The Molecule diagram from step 2, decisions regarding combat, encounters, architecture, mechanics, and pacing/reward schedules.
- Application: Create a map, refine the level’s pacing (e.g., intense combat gameplay and exploration areas), plan platforming sections and puzzles, estimate the number of rooms and enemies, and make relevant notes.
- Output: A Map.
- Relevant Roles: #roles/designer Designer, #roles/artists Artist.
- Relevant Tools: Digital Art Tools.
- Relevant Methods: Drawing a Map, Pacing Diagram, Reference Collection, Symbols and Visual Language, Behavior Diagram, and possibly Combat Design.
4. Get a sense of space
- Roughly construct the level to grasp its spatial aspects quickly.
- Test which ideas work and identify those that don’t.
- Input: The map from step 3, one of your preferred Game Engines.
- Application: Create a rough 3D representation of the level using basic blocks. Maintain the map’s scale.
- Output: Not a complete Blockout, but a 3D version of the map without details, along with early problem detections and decisions.
- Relevant Roles: #roles/designer Designer, #roles/engineers Engineer.
- Relevant Tools: Game Engines.
- Relevant Methods: Massing (early stages).
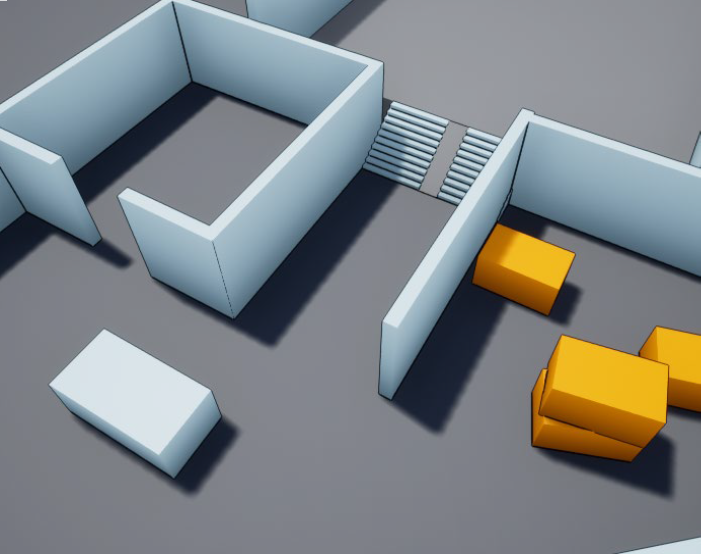 Roughly mapping out the level, similar to a Gym Scene (Source: TychoBolt (K., Alex) 2020 - In Pursuit of Better Levels)
5. Iterate over the map
- Adjust the map based on findings from step 4.
- Input: Findings from step 4, the map from step 3.
- Application: Reiterate over the map, making corrections. Either create a new map or annotate the existing one. Enhance the map’s accuracy and scale through multiple iterations.
- Output: A more refined but not final version of the Map.
- Relevant Roles: #roles/designer Designer, #roles/artists Artist.
- Relevant Tools: Digital Art Tools.
- Relevant Methods: Drawing a Map, Critical Path Analysis, Behavior Diagram, Reward Schedule, Pacing Diagram, Nintendo Power Method.
6. Blockout the level
- Implement the level with rough blocks, also called whiteboxing (architecture reference).
- Input: The refined map from step 5 and the level from step 4.
- Application: Construct the level using blockouts to define essential architecture and objects. Continuously test the level and make adjustments to parts that aren’t working.
- Output: A Blockout.
- Relevant Roles: #roles/designer Designer, #roles/engineers Engineer.
- Relevant Tools: Game Engines, Computational Tools.
- Relevant Methods: N/A
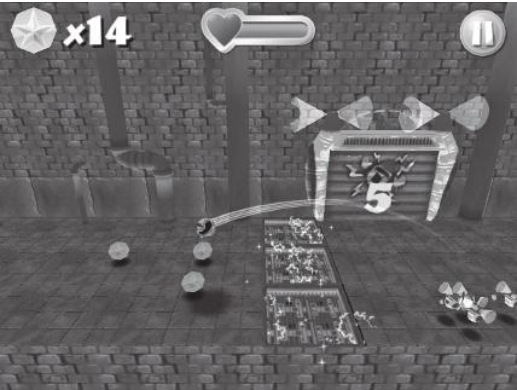 Whiteblocking in SWARM! to test the dynamics of the level (Source: SWARM!)
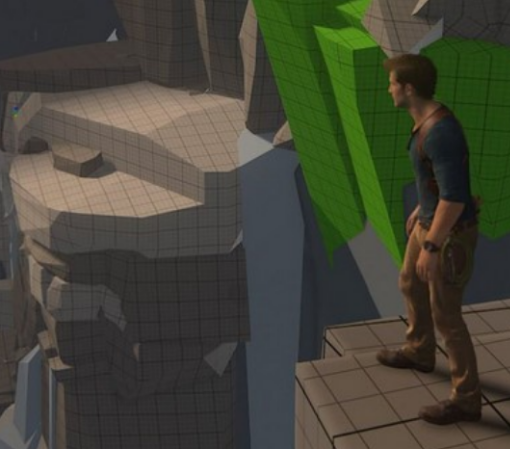 Blockout in Uncharted (2007)
7. Iterate over the level
- Improve the map and the blockout through iterative processes.
- Repeat the cycle of Implement -> Test -> Iterate.
- Gradually add more details and make decisions until you are satisfied with the outcome.
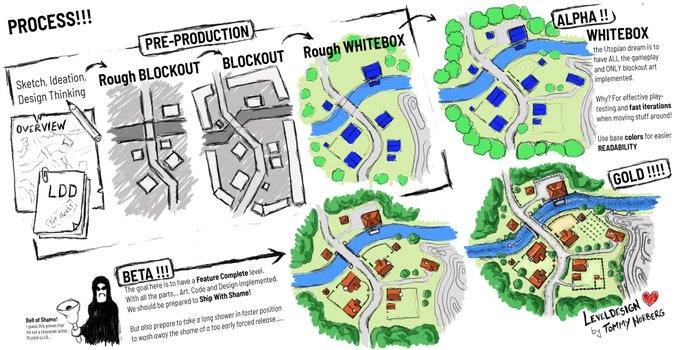 Iteration process by Tommy Norbert _(Source: Tommy Norbert’s website, link)__
Applicability
- This process provides a solid starting point for designing the spatial layout of your level.
- However, it may not suit everyone’s preferences and is not a mandatory approach. Consider it as a source of inspiration.
- It requires multiple iterations, as highlighted by Tommy Norbert.
Pros and Cons
Pros:
- A practical starting point, especially for beginners.
- Effectively addresses spatial layout and implementation.
- Iterative approach prevents the carryover of early problems into later development phases.
- Supports agile Game Development.
Cons:
- Usually requires collaboration and cannot be executed by a single person, making it relatively complex.
- Not suitable for everyone and may not align with all design philosophies.
- Primarily focuses on spatial layout, leaving detailed architectural work for later stages.
- May feel disconnected if you solely concentrate on spatial layout without considering the story or pacing within the level.
- Risks neglecting game mechanics if the focus remains solely on spatial layout.
Related Processes
- part of Game Development (Pre-production phase)
- Includes Combat Design and Iterative Map Design
Relevant Literature
TychoBolt (K., Alex) 2020 - In Pursuit of Better Levels
Totten 2019 - An Architectural Approach of Level Design
Uncharted (2007)
SWARM!
...
Notes mentioning this note
Molecule Diagram
also known as:
Classification
#method
#medium/diagram
#medium/graph
#medium/visual
#tools/non-digital
#tools/digital
#process/planning
#process/designing
#roles/designer
#roles/engineers
#roles/artists